
Getting started
Install Kaleta.
Upload the files, open the installer, pick a starter site and the extensions you need. Ten minutes later you are editing.
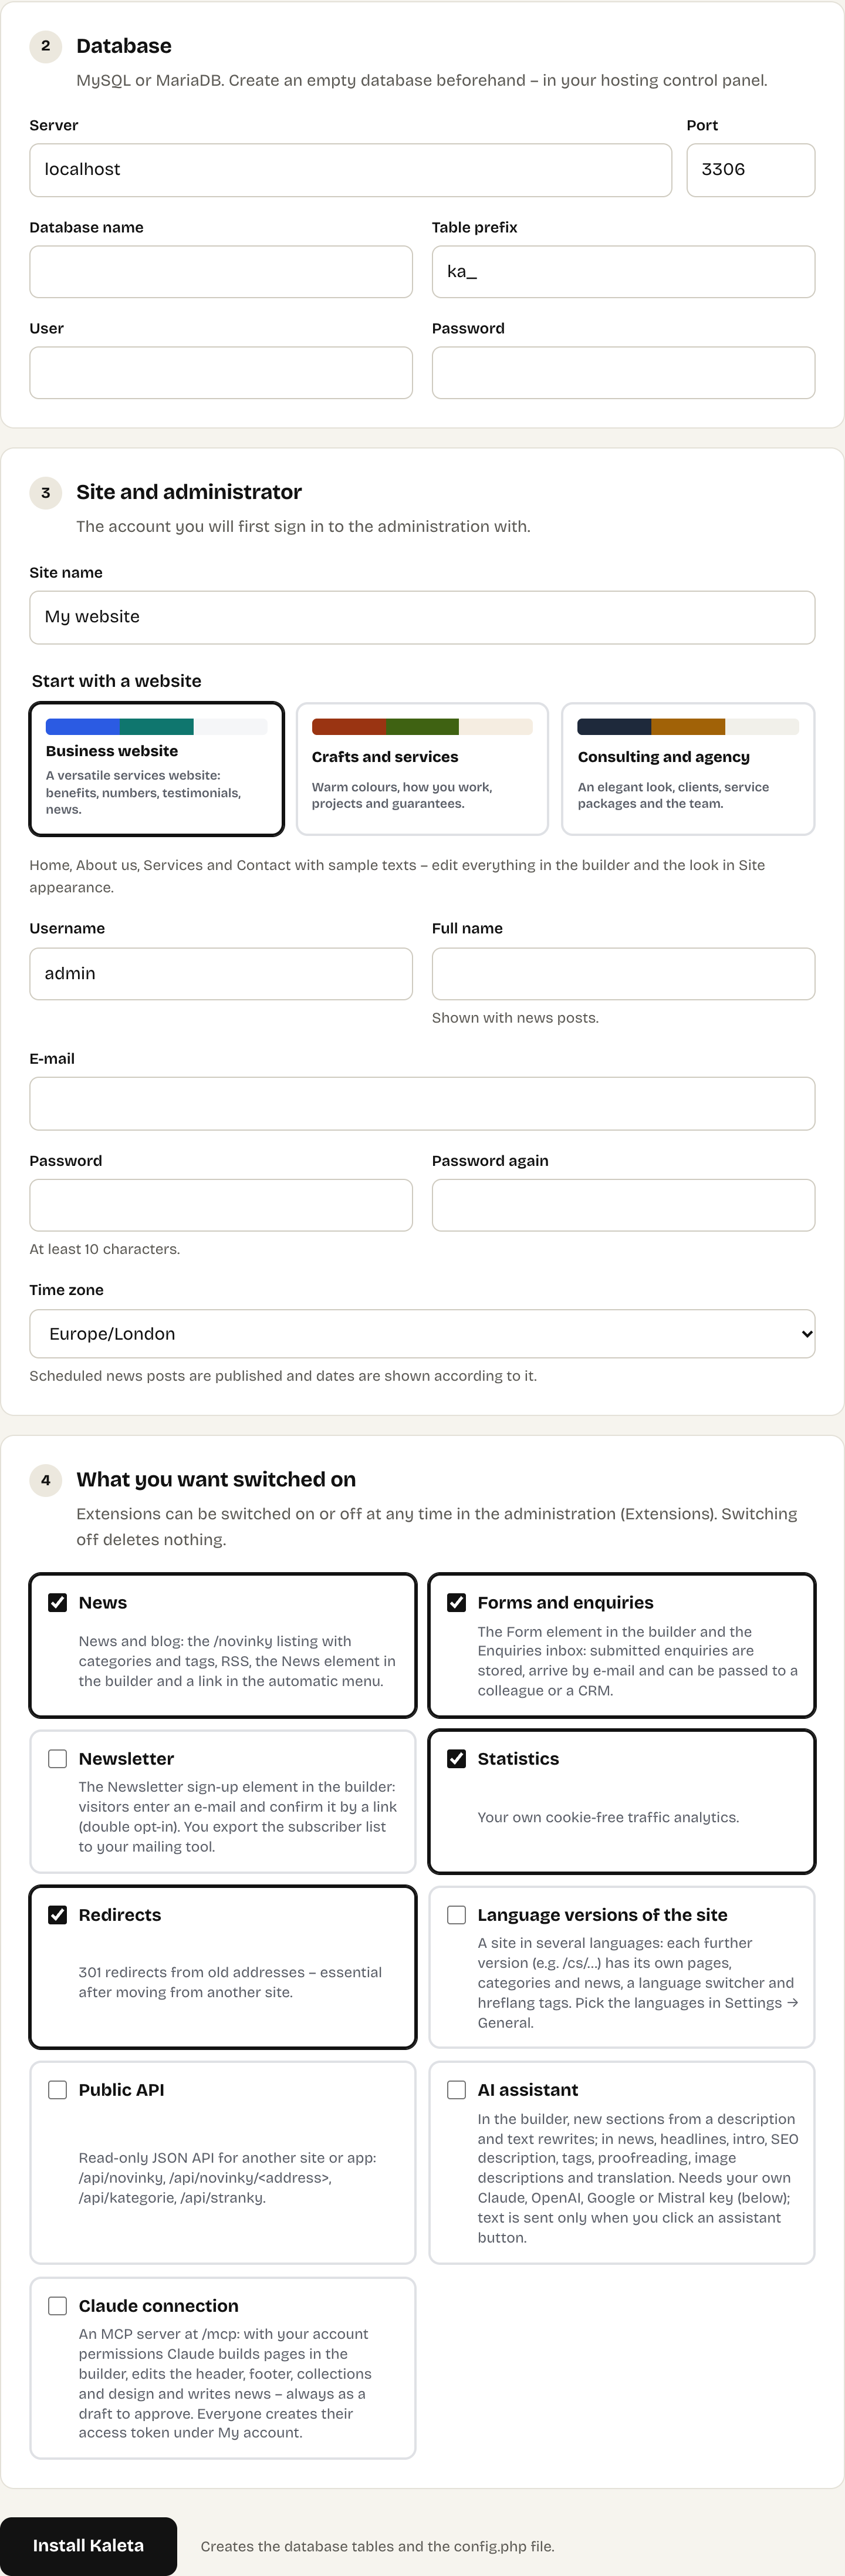
The whole installer: server check, database, site and administrator account, starter site and extensions
What you need
- Web hosting with PHP 8.4 or newer and MySQL 8 or MariaDB 10.6+.
- An empty database and its user name and password.
- The Kaleta ZIP from GitHub Releases.
Run the installer
- Upload the files to your hosting (FTP is fine) and open
/install.phpin the browser. - Fill in the database details, the site name and your administrator account.
- Choose a starter site: Business website, Crafts and services or Consulting and agency. Each brings its own look and Home, About us, Services and Contact pages built from ready-made sections with sample texts.
- Choose what you want switched on: News, Forms and enquiries, Newsletter, Statistics, Redirects, language versions, the AI assistant, the Claude connection… You can change this later under Extensions – switching an extension off deletes nothing.
The installation also creates a draft Privacy policy page. It is linked from the footer, the cookie bar and the consent box of forms – fill in your details before you launch.
After the installation
The admin is at /admin.php. Sign in with the account you just created and follow First steps on the Dashboard.